How To Replace Graphics Card

If you are installing a new GPU, and you do not have a dedicated card yet, then you can skip this section. If you are upgrading, you will have to remove the older graphics card before installing the new one.

Before installing your new, beefy graphics card, you need to make sure that you have removed any older drivers for the card you are replacing. If you bought a new card from a different manufacturer (AMD or NVIDIA) from one you already have, you will want to completely uninstall all drivers from the whole PC prior to installing your new graphics card. You need to download and install drivers from the company that makes the GPU in your updated graphics card, which, in nearly all cases, is going to be either AMD or NVIDIA.

Once you have got your graphics card working, you are encouraged to delete all of the drivers and extra software used by your older graphics card. Before you can use your graphics card for intensive tasks such as gaming, it is necessary to install new drivers to ensure that Windows and software are effectively communicating with your card.

Once these steps are completed, your old GPU should only be connected to a PCIe slot on the motherboard. The major parts of installation are in the case and PCIe slots on the motherboard.

Once the new GPU is securely placed into the PCIe slot it was designed for, plug the power cord into place. Plug in any necessary power cables to the new cards power connector at the top, as described previously. Next, secure the brand-new one to your PC cases backplate, then connect your power cables.

With the new graphics card secured in place and powered on, complete the work by sliding the side panels of the case back into place and connecting your Display Cable to your new graphics card. With the graphics card securely installed and connected to your power supply, you can close your case up and get on with the software part of the install.

Make sure that your graphics card is connected to your power supply and is evenly placed into your PCI-E slot. Make sure no cables are blocking the slot, and that none are going to extend under the rear of the card.

Secure the card to the enclosure using Phillips-head screws (most boards will ship with a pair). Install screws that will secure the back of the card to the rear of the case, and reconnect any extra stands or supports that you removed.

Secure the graphics card in its slot using the screws(s) that were removed previously. Once this is done, remove the screws holding the new GPU to the backplate. If you are replacing your existing graphics card, remove all cables connected to it, remove the screws from the brackets holding it in place in the back of the PCs housing, then pull out your card.

Locate the graphics card you wish to replace and remove it from its slot. Push the card down hard straight into the slot until you feel the cards latches click, and that it is slotted in smoothly. Then, all that is left is to press the retention clips down into the PCIe slot and carefully pull/pull your old card toward you.

After that, you will want to turn off your aged system, remove the cables, and (using a screwdriver, if necessary) open up your PCs body. Make sure the computer is fully powered down before working inside. Next, check to see that your computer has the right hardware in place to support your new cards.

The only real kinks may be your power supply and cables, which we get to in a bit, as well as your cards actual installation, which can be planned ahead.

Beyond the power is the question of physical power connectors you need to run from your power supply to your new video card. For instance, if you are buying a beastly $1, you need to have a power supply that meets the minimum of 750W that Nvidia recommends, as well as a couple of 8-pin power connectors. One last thing worth noting on the power front is how many connectors your GPU requires.

There is a possibility that an all-new one might need more power cables than an older GPU. In fact, your PC might be unable to boot up unless you plug those PCI-E power cables in. While built-in graphics draw power from your CPU, many discrete PCI Express graphics cards can draw so much energy from your computers power supply it might be unable to sustain their operations.

No matter how powerful your PC is, there is no way that you are going to play todays games without a dedicated graphics processing unit (GPU). Even if you have got a discrete graphics card for a laptop, unfortunately, you cannot swap that out, since that GPU is soldered onto the motherboard before it even leaves the factory and ends up in your hands.

Just a year ago, gamers looking to upgrade from aging graphics cards to a new-generation card that contained GPUs such as Nvidias GeForce RTX 3080 or AMDs Radeon RX 6800 XT simply could not find them, either without paying the huge markups on Ebay, or getting lucky as trickles of stock turned up at retailers such as Best Buy or Newegg. On the demand side, we saw the growth of cryptocurrency-mining farms using powerful graphics cards to accelerate their operations, as well as increased demand for cards as older and newer gamers tried to update their systems to play new games in 2020s pandemic shutdowns.
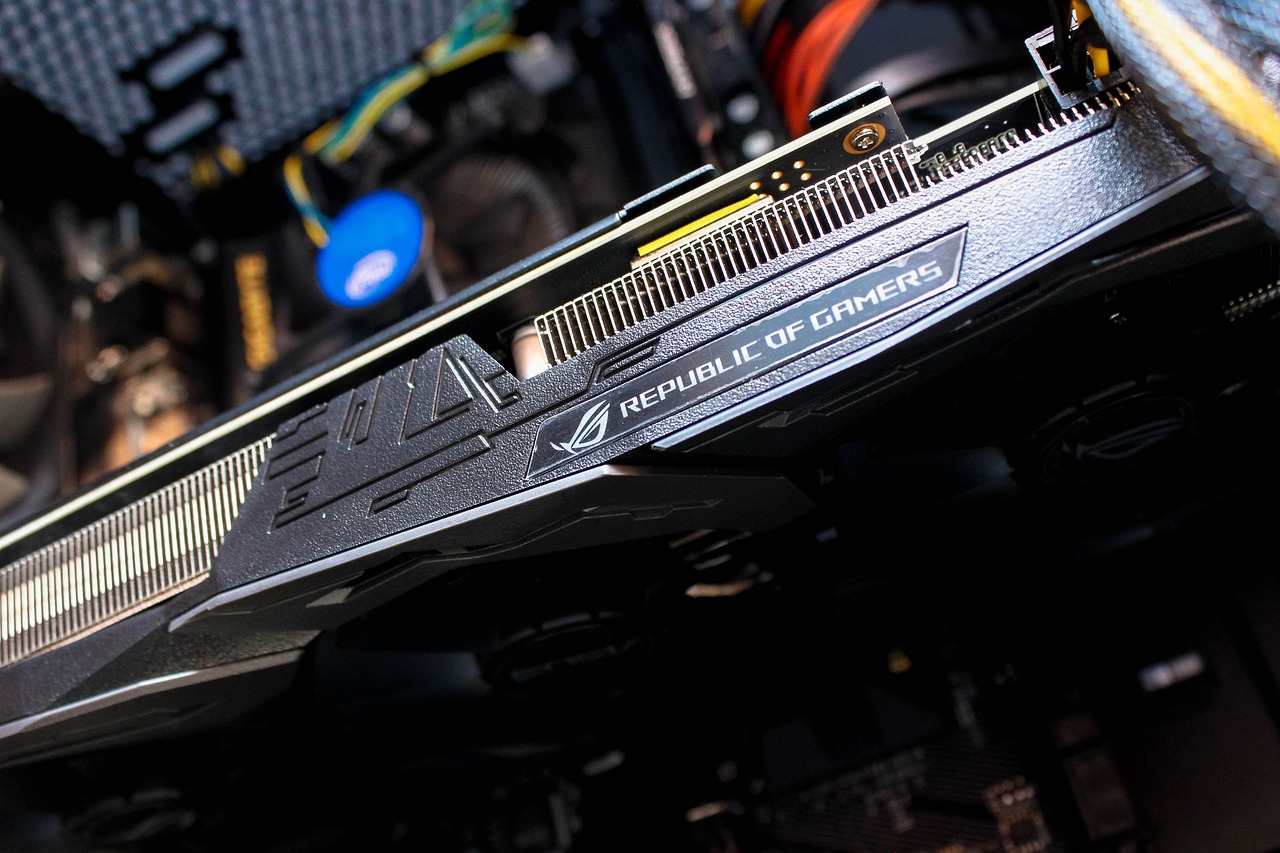
How To Remove Graphics Card

If you are making room for a new video card, you will probably want to completely remove the video card, all of its cables, and software. Whether you are looking to install a new graphics card, or you are going to keep the older one after cleaning, this is pretty straight forward, as you will only have to re-verse the steps you took when you removed your graphics card.

If you are just cleaning the GPU, or you are replacing the GPU with one similar to your current GPU, you can skip this step entirely since you will use the same drivers you used previously. Assuming that you already had the PC turned off, you can also skip this step.

Wait thirty seconds or so, and then unplug all of your cables from the rear of the PC. It is recommended that you ensure your PC is turned off and that all cables connected to the enclosure are disconnected before opening.

Then continue unplugging power cables from the rear of the case. Once you have disconnected power from your PC, as well as all of your cables, you will want to take off the side panels of your PC case. Unplug all of the power cables, and remove any peripherals, including your mouse, USB flash drives, keyboard, monitor, etc., from the case, making sure that nothing is attached.

Push the card down hard straight down the slot until you feel it click in and is evenly inserted. Once the clips are released, or if you are holding a clip, you can now extract the GPU from the PCIe expansion slot. Press on the small plastic clips/latch at the sides, then continue pulling the PCIe cables.

You can pull out a PCIe cable by pushing down the cable clip, then gently pulling the cable out of the graphics card itself. Depending on your GPU model, you might even have a cable that goes right into your PCI slot. Depending on the GPU brand and model, you might have to plug in a power connector for your card.

Once you remove the cables from your graphics card, they are still connected to other parts of your PC. If you are going to install a different card into your computer, you will need to remove the cables in order to make room for a new card.

Once you have placed your new graphics card into your PCI-E slot, be sure to secure your new graphics card into your case using the screws that you removed from the old one. Once your old card is out and is no longer secured to the case by screws, you can push down gently on the captures on the ends of the PCI-e slots, which holds your graphics card.

You should insert your new graphics card into the PCI-e slot, as well as the old one that you removed. Look for the layer or slit you can push or pull on to free the GPU from the PCI-e slot on the PCI-e slot on the motherboard.

Next, you will want to remove a thumbscrew that holds the tab for your PCI-E slot, there might be different amounts of screws. While most GPUs are attached to the motherboard through the PCI-E slots, you might need to remove the cards from their cases as well. If your monitor is attached to the case, with its outputs at the bottom, close to the PCI-e slots, then your card is the specialized card that you may want to remove.

One thing should be taken care of, but one thing to bear in mind is most laptop manufacturers solder your graphics/video card onto your motherboard, so replacing it is difficult. Removing the video card means that you are going to take apart basically the entire laptop, and be able to get everything to fit together without any problems. Removing a laptops graphics card (if it is even possible) would cause motherboard and consequently the laptop damage, so this is not recommended task.

Nothing should be hard on hardware, if you are having problems with the removal of a graphics card, forcing a lever on a PCI-Express slot which holds your computers GPU attached to your motherboard, then you are definitely doing this the wrong way. If you are using a cooler on the graphics card, you may have to take that off of the card or computer in order to remove the GPU.

If you want to be a little bit more supported, you could secure the GPU itself with the cooling fan, or with the backplate, if you have one.

Now that you have exposed the GPU, you can now move onto unplugging the PCI Express (PCIe/PCI-E) cables currently connected to it. If your older card has one or more of these cables connected to it, continue to gently remove them before proceeding.

Your GPU is almost certainly strained to provide extra support at the rear (where its ports are located), meaning you are going to need a proper screwdriver for this part of the job, as well as some good ol handiwork. Before you can remove the GPU, you first have to push down a rather small retainer clip located on the right-hand/backside side of your PCIe x16 slot — thus, under your GPU. Next, it is to pop off the PCIe Expansion Slot Clip, which holds your GPU to the motherboard.

Secure the card to your chassis using Philips Head screws (most cards will ship with a pair). Set the screws up somewhere near the side, making them easier to locate when reinstalling your card.

What Graphics Card Is In The Xbox Series X

The Xbox Series X packs a GPU powered by RDNA 2, the same architecture used to power current-generation Radeon RX 6000-series graphics cards. The Xbox Series X is a capable console, packing a 8-core Zen-based AMD CPU, featuring an RDNA 2 Architecture-based GPU from AMD, providing 52 compute units. Given its triple-A PC gaming performance since release, the GPU equivalent of the Xbox Series X is either the AMD Radeon RX 6700 XT or Nvidias Geforce RTX 3070.

Then again, it is well known that the Xbox Series X falls in the middle of those two GPUs, and there are quite a few design quirks that might make another GPU more comparable under a different scenario. While it is not always possible to accurately compare console hardware with PC hardware, testing has indeed shown the Xbox Series X has a GPU that is comparable to AMDs RX6600 XT and Nvidias RTX2080. While on paper, RTX 3090 and AMDs Radeon RX 6700 XT are comparable GPUs to the Xbox Series X, real-world performance shows this is not true.

The RTX 3060 Ti, on the other hand, handles 1440p games quite well, and it is capable of hitting 60FPS on most titles, if not all, without any meaningful tuning. If you are interested in gaming at a 60 FPS in 4K, you will want something like an RTX 3070 as the minimum. To get this type of gaming performance on PC, you are going to want to at least have the NVidia GeForce RTX 2080 or the Radeon RX 5700 XT.

At 12 teraflops of graphics performance, the GPU inside the Xbox Series X is slightly faster than the GeForce RTX 2080 Super from Nvidia, and it is only slightly behind the 2080 Ti, which is the best graphics card currently available for gaming. This kind of performance puts the Xbox Series X above most of the middle-tier graphics cards from AMD and Nvidia, and 12 teraflops of GPU performance is an impressive leap for a game console. It definitely shows the next-gen Xbox and PS5 will be well ahead of the Xbox One X and PlayStation 4 Pro.

The best graphics card which is a near-equivalent of the graphics power in the Xbox Series X is Nvidias RTX 3060. The RTX 3060 offers 13 teraflops of graphics power. Boasting 3,584 shader cores that can push the power of even the most demanding games, the Nvidia RTX 3060 offers 13 teraflops of graphics computing power. This means that Nvidias RTX 3060 can match, and often surpass, Xbox Series Xs graphics performance, either by running you games with a bit higher resolution, faster frame rates, or more graphics bells and whistles.

By using Nvidias DLSS, combined with an RTX 3060, you can hit 60fps on most Xbox Series X titles on PC, without having to sacrifice resolution or graphical accuracy. You will need twice the graphics GPU horsepower of an Xbox Series X to play locked 60fps Xbox Series X games. If you are upgrading from your PC, and want performance comparable to that of the more powerful next-gen consoles, with comparable frame rates and graphics settings, you are going to have to get a GPU with power comparatively equal to that of the Xbox Series X.

Now that the Xbox Series X is sporting a GPU even more powerful than an RTX 2080, and at a price that is likely going to be much more affordable than the top-end graphics cards, real 4K gaming is going to hit the mainstream. It is already offering a lot more graphics firepower than the Xbox Series X. Brad Chacos/IDG The Xbox Series X and PlayStation 5 are just now getting up to speed with the performance of last-gen graphics cards, such as last-gen RTX 2080 Super. We still do not know every single detail, but console gaming is one area that will see AMDs competitors dominating the field thanks to their silicon in the Microsoft Xbox Series X and Sony PlayStation 5.

The same tech has a codename of Navi 2X, or the moniker of Big Navi, as it will appear in all graphics cards and the next-gen consoles, for Microsoft as well as the Playstation. AMDs 2nd Generation Radeon DNA architecture is what will be delivering AMDs next wave of Navi GPUs to consumers. Microsoft has said its next-generation console, the Xbox Series X, will feature a GPU built upon AMDs second-generation Radeon DNA architecture (RDNA 2 (open in new tab)) The AMD Radeon DNA 2 second-generation architecture offers 12 teraflops of graphics performance.

We saw expandable NVMe storage, got our first taste of hardware-accelerated ray tracing on a next-gen console, and saw how one of Microsofts most talented developers is looking to bolster one of the most technically impressive games available today on Xbox Series X. Way back in 2016, one year before the work was completed on the Xbox One X, Microsofts silicon team was already working on Series X, beginning the architecture work for next-gen features we will finally see hitting the market in Holiday 2020 — a stark reminder of just how long new technologies can take to be developed. During our time in Microsofts mothership, Redmond WA, Microsoft demonstrated just how fully-featured the consoles RT capabilities are, rolling out an extremely early Minecraft DXR technology demo on Xbox Series X, based off of Minecraft RTX code that we saw at Gamescom last year, and looking remarkably similar, despite running a completely different GPU.

Microsoft is also branding their upcoming Xbox Game Studios as Smart Delivery, meaning that the game will playable on either the original Xbox One or Xbox Series X consoles. Microsoft has also revealed some more details on the Navi GPU within Xbox Series X. Namely, that it will support Variable Rate Shaders (VRS) and hardware-accelerated DirectX Raytracing (DXR). Microsoft has already begun testing a final element of DLI with sub-4K output on supported HDMI 2.0 screens through Xbox One S and Series X.

How To Refresh Graphics Card

Once the graphics card finishes its rebooting process, the windows experience should appear just like it always has. Once you are done with uninstalling, you can restart the device, and Windows will automatically install your graphics drivers again. If you killed the driver process, Windows will automatically restart it.

This ability to automatically restart the driver is incredibly helpful, but it does not require waiting until the system notices the problem. Other drivers may also get stuck, sometimes, and can be restarted manually, with some help from the device manager.

Other drivers may also eventually freeze, and that requires visiting the device manager to be reloaded. If this does not fix your issue, you may want to try to reinstall the drivers for it. Restarting a driver may fix small problems that appear out of nowhere.

For instance, if your monitor suddenly starts showing artifacts, restarting its drivers might solve the issue. If your graphics card has a lingering issue, restarting its drivers will not solve it. Last, but definitely not least…sometimes you simply get strange graphics problems, and think a clean reinstall of the drivers will solve it.

If Windows 10 and 11 keeps freezing up after reinstalling driver software, then a deeper issue might be at play. Manually uninstalling the driver will help you resolve the problem, since Windows 10 and 11 will not do this automatically.

To quickly revert the graphics drivers, you can hit Windows Key + Control + Shift + B. One of the fastest ways to reset or reboot a graphics card is by pressing the keyboard shortcut Windows key + Ctrl + Shift + B.

This keyboard shortcut is a part of Windows 10 OS, and as such, will reboot the graphics drivers for NVIDIA, AMD, and Intel. If your PC does not respond to either of these shortcuts, even after you rebooted its graphics drivers, then you probably will have to do a hard shutdown.

If you are seeing a black screen, or are stuck playing a game with no response at all, make sure you try using the shortcut Ctrl+Alt+Delete after you reboot the graphics driver. This command makes your screen go black for a second, but restarts your graphics drivers, potentially fixing whatever problems you are having. If you are getting any sores from colour issues or displaying errors on your computers monitor, you may want to try forcing its associated drivers to reboot using a simple hotkey.

Whenever you encounter any major issues with the graphics driver, Windows 10 and 11 will reset the driver automatically in order to re-initialize and resolve the problem. Windows 10 and 11 are user-friendly in such situations, resetting your driver automatically.

Windows will fall back to its general-purpose display drivers when you remove the original ones. Also, Windows may fail to automatically install a broken driver once you have uninstalled it.

In the event that Windows does not, you can always manually install the required drivers using the “Update Drivers” option. You can manually delete older drivers using Device Manager or the Control Panel.

Under Drivers, choose Uninstall device option to delete drivers. In the pop-up box, tick the box next to Remove Driver Software for Display Adapter and press uninstall. Locate the Display Adapters, click the arrow to expand, and then right-click on the graphics card and choose Remove Device.

Next, make sure the Display Driver is updated by opening the Device Manager, clicking Display adapters, right-clicking your graphics drivers, and selecting Update Drivers. This will bring up an Update box, click Automatically search for drivers. Here, find the driver which is unresponsive and select Disable driver followed by Enable driver in right-click context menu.

The Driver Easy software will scan for any drivers that are causing problems, and the option to update them will be displayed on screen. Restart your PC, and your PC will look for and automatically install the proper drivers.

You might need to install software & drivers again after those two steps, just to be sure that your graphics card is fully utilized, rather than using a barebones driver. You can count on this software to perform these improvements, ensuring proper updates to the latest graphics card drivers. Many drivers are device-specific and OS-specific for that reason, and, in the case of a complicated device such as a discrete graphics card, are updated periodically to increase performance and address bugs.

As it turns out, graphics drivers can prove pretty fundamental to your systems proper operation, and even small driver issues can show up devastatingly. Restarting graphics drivers is a great starting point if you are experiencing display issues, since it is fast and simple, and it is more than likely going to solve your issues.

While Windows 11/10 will restore your graphics driver by itself, you can always reboot the graphics driver or display driver manually within Windows — just in case your video driver crashes. If the Display driver has gone bad, then simply rebooting might not fix the problem for you. If you are experiencing certain graphics issues on your system which continue to occur even after the PRAM reset, then you can completely reset the system.

These resets usually operate at very long times, and users might wish to perform their own resets manually, prior to Windows 10 and 11 doing so natively. There are several types of resets, from refreshing drivers to reinstalling drivers.

What Does Ti Mean In Gpu

When used in a product title of a Nvidia GPU, the Ti tag is part of Nvidias naming scheme for their GPUs, used to denote that a given graphics card is a redesigned or higher-performing model compared to its normal, or non-Ti, predecessor. Typically, the term TI appears in GPU products that are either more advanced or better performing than their non-Ti predecessors. Similar to GTS, GTX, and GT, the Titanium or Ti designation is used by Nvidia for card ratings following the GeForce 200-400 era. The Ti designation on Nvidia graphics cards stands for Titanium, referring to branded Titan cards for applications requiring higher processing power.

Ti graphics cards are manufactured by Nvidia, these GPUs are known for having higher performance compared to non-Ti models, and are generally released after the first batch of the new-generation GPUs are released. In any event, NVIDIA has been making Ti cards since its GeForce 2 line of cards way back in 2001. The RTX 2080 Ti GPUs were the fastest on the market for several years before being overtaken by newer generation GPUs from RTX 3000. Whereas, the GPUs such as RTX 3080 Ti has quite the leap over non-Ti RTX 3080 models.

Ti GPUs deliver better performance due to having extra memory, more Shader Processing Units (CUDA) cores, etc. For example, the incredibly powerful RTX 3080 Ti offers 12GB of VRAM and 1,0240 CUDA Cores, as opposed to 10GB and 8,704 for the RTX 3080. Ti GPUs offer better performance by having extra memory, more Shader (CUDA) cores, and so on For instance, the extremely powerful RTX 3080 Ti offers 12GB of VRAM and 10240 CUDA cores in comparison to the 10GB and 8704 of the RTX 3080. The TI cards are typically stronger than the non-Ti cards of the same model numbers (for instance, a GTX 970 Ti is faster than an ordinary GTX 970), because they include additional shader processors as part of the design. If you can afford it, a 6GB GTX 1060 would provide significantly better performance over the GTX 1050 Ti. Compared with the GTX 1660 Super, The GTX 1660 Ti is still the faster card overall, but as you can see below, the 1660 Super does come pretty close to hitting 60fps on Ultra settings in a surprisingly high number of cases.Ti cards generally are more powerful than non-Ti cards with the same model number (for example, a GTX 970 Ti is faster than a plain GTX 970 ), as their design will include additional shader processors.If your budget allows, the 6GB GTX 1060 is going to offer considerably better performance over the GTX 1050 Ti. NVIDIAs GeForce RTX 2080 Ti is built to deliver both gaming realism and performance.

The RTX 2080 is Nvidias non-Ti GPU, while the RTX 2080 Ti is the Titanium card. GeForce RTX 3080 Ti is the strongest Ti graphics card right now, only truly bested (and only then, just barely) by the RTX 3090 and AMDs RX 6900 XT. The RTX 3080 Ti unit is not only fairly powerful, it is capable of giving you similar performance as top-end models such as the RTX 3090 Ti model.

The Ti card is essentially a faster/better version of the original graphics card. The Ti is meant for some of Nvidias selected models. Some have claimed Ti for the NVIDIA cards stands for Technical Improvement, and this makes a certain amount of sense, as Ti cards are improved versions of base model cards. The general consensus is that it really stands for Titanium, since it is always stylized to correspond with the atomic symbol of the element Titan on the periodic table.

While it is true that in other contexts, like when describing a metallic chemical symbol, the Ti prefix is often used for titanium, these graphs are clearly not infused with real Titanium. There are plenty of examples, like 3080 Ti, 2080 Ti, etc., which does not imply the GPUs are made of Titanium. It does not mean the GPU is made from Titanium, but usually indicates the GPU has higher performance compared to the non-Ti models.

Ultimately, we would recommend 3080 Ti for gamers, although the Ti has slightly higher performance numbers in certain titles. The Ti in NVIDIA graphics cards stands for Titanium, which means the card is more powerful than non-Ti versions of the same model number. This means the card is made out of Titanium. The 2060 Super is also a GPU option from NVIDIA — it is just not quite as powerful as 3080 TI. NVIDIAs TI GPU is strong enough, and it is an extremely capable version of a non-TI card, so that can get you through until the next Super variant is released.

The NVIDIA GTX 1660 Ti is one of the strongest graphics cards in its price bracket, and you can expect to be running every title in 1080p Ultra at a playable framerate, provided you are pairing it with a decent CPU. RTX stands for Ray Tracing Texel eXtreme, and is a variant of Nvidia as well. RandomGamingInHD has an excellent video about this cards 4K performance (in games, but also holds up in general usage) on their channel, and is pretty impressive indeed. The Nvidia GeForce GTX 1650 Ti is a middle-of-the-road laptop video card. The 1650 Ti is a slightly faster version of the standard 1650. The Ti shorthand means Titanium when seen in an NVIDIA GPUs name.

NVIDIA used to use the MX brand for a lower-end, tier card, but ultimately, in order to keep things uniform, NVIDIA marks all their slightly higher-end hardware with TI branded. With Ti-version graphics cards, we see the increased shader (CUDA) cores, increased VRAM, and the Ti cards generally have higher-value, higher-performance GPUs within the GPU generation lineup from NVIDIA, as opposed to the non-Ti GPUs. Nvidia could have called this card the GTX 1075, but instead Nvidia went with GTX 1070 Ti. Nvidia also released a GTX 590 after that, packing two GF110 GPUs into one card.

How To Properly Reset Your Graphics Card

Graphics cards are integral to a gamer’s experience. They provide the high definition graphics that make every game come to life. But sometimes, these graphics cards can become corrupted with glitches or bugs, which in turn can lead to crashing and other problems. The good news is that resetting your graphics card or GPU card can help fix many of these issues!

How to properly reset your graphics card

If you’re having issues with your graphics card, one of the first things you should try is resetting it. This can help resolve any driver or software issues that may be causing problems. Here’s how to properly reset your graphics card:

1) First, shut down your computer and unplug it from the power outlet.

2) Next, remove the graphics card from your computer. For most computers, this will involve removing a few screws and carefully sliding the card out of its slot.

3) Once the card is removed, use a can of compressed air to blow any dust out of the card and its connectors.

4) Re-install the graphics card in your computer and screw it in place.

5) Plug your computer back in and turn it on. Windows should automatically install the drivers for your graphics card. If not, you can download them from the manufacturer’s website.

6) Once everything is up and running, open up your graphics control panel (usually found in the Start menu) and check that everything is working properly. If not, you may need to adjust some settings or perform a more thorough reset of your graphics drivers.

How to setup a gpu card reset

If your graphics card is acting up, one of the first things you should try is a reset. This will help clear up any potential software issues and get your card back to its default settings.

Here’s how to do a reset:

  1. Shutdown your computer and unplug all cables from your GPU card.
  2. Remove the GPU card from your computer.
  3. With the card removed, use a can of compressed air to blow out any dust that may have accumulated inside the card or on its components. Be sure to aim the can away from yourself and avoid spraying directly into any openings on the card.
  4. Re-install the GPU card in your computer and reconnect all cables.
  5. Start up your computer and enter into your graphics card’s control panel (usually accessed by right-clicking on your desktop). Find the “reset” option and click it. This will reset all of your graphics settings to their defaults.

What is in a gpu card reset

When you reset your graphics card, you are essentially restarting it from scratch. This means that all of the settings and preferences that you have set will be reset to their default values. In some cases, this can be a good thing, as it can help to fix issues that you may be having with your card. However, in other cases, it can cause problems because you may need to reconfigure your settings after the reset.
If you are having problems with your graphics card, resetting it may be the best course of action. However, if you are not having any problems, you may want to leave your settings as they are.

What is the benefit of a graphics card reset?

A graphics card reset is a process that can help fix display issues, improve gaming performance, and resolve driver-related problems. When you reset your graphics card, all of the current settings are wiped and replaced with the default settings. This can be helpful if your graphics card is not performing as well as it did when you first bought it, or if you’ve installed new software that is incompatible with your graphics card.

There are a few different ways to reset your graphics card. The most common way is to use the Windows Device Manager. To do this, open the Device Manager (search for it in the Start menu), find your graphics card under the “Display adapters” heading, right-click on it, and select “Properties.” Under the “Driver” tab, click “Roll Back Driver” to reinstall the previous driver version, or “Update Driver” to install a new driver.

If you’re having trouble finding the appropriate drivers for your graphics card, you can try downloading and installing a driver-updating tool like Driver Booster. This will scan your computer for outdated drivers and automatically install the latest versions.

Sometimes, simply uninstalling and reinstalling your graphics card drivers can solve problems. To do this, open the Device Manager as described above, find your graphics card under the “Display adapters” heading, right-click on it, and select “Uninstall device.” Confirm that you want to uninstall the device , and then restart your computer. Windows will automatically reinstall the drivers for your graphics card when it starts up.

If you’re still having problems after resetting your graphics card, you may need to replace it.

Conclusion

There are a few different ways to reset your graphics card, but the steps we outlined in this article should work for most people. If you’re still having issues after following our tips, then you may need to contact your graphics card manufacturer for further assistance. Thanks for reading!